Designer Pane
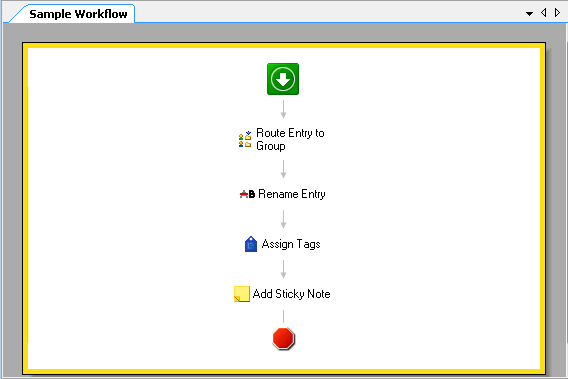
This pane is the canvas on which you build workflow definitions with workflow activities. Each workflow definition is associated with its own Designer Pane and appears in the center of the Workflow Designer. More than one Designer Pane can be open at the same time. How to build a workflow.
![]() Show me a screenshot of this pane.
Show me a screenshot of this pane.
Opening a Designer Pane
- Select the New Workflow
 button from the toolbar. Alternatively, use the keyboard shortcut CTRL+N.
Adding an activity to a workflow definition
- Drag it from the Toolbox Pane and drop it in the Designer Pane. Alternatively, double-click an activity in the Toolbox Pane.
Displaying the workflow's description and summary
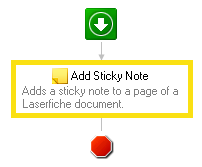
- Workflow Description: Right-click in the Designer Pane and point to Description Options. Under the heading For this workflow, select Show Description.
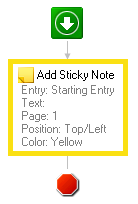
- Workflow Summary: Right-click in the Designer Pane and point to Description Options. Under the heading For this workflow, select Show Summary.
Note: The workflow's description is also shown in the Workflow Description property box.
Note: You can also see a workflow's summary and activity summaries by right-clicking on an activity or the Designer Pane, selecting View Properties, and select the Summary tab.
Displaying activity  descriptions and
  summaries
- To show the description and/or summary for one activity, right-click the activity and point to Description Options. Select Show description or Show summary. To configure an activity to display whatever option(s) are selected under the For all activities heading, select Use default (specified in 'For all activities').
- To show all activity descriptions and/or summaries unless otherwise configured, right-click the Designer Pane or on an activity. Point to Description Options, and select Show descriptions by default or Show summaries by default. The activity descriptions and/or summaries will show for all activities, unless an activity was individually configured to display something different from the default.
- To show all activity descriptions and/or summaries regardless of individual configurations, right-click on the Designer Pane or on an activity. Point to Description Options, and select Set all activities to 'Use Default'. Whatever is selected under the For all activities heading will be displayed for all activities. Any activities that were individually configured to display something different from the default will be reset to the default configuration.
- To set the width of descriptions and summaries, right-click on the Designer Pane or an activity. Point to Description Options, and select Limit description/summaries widths to. You can choose from a variety of widths measured in pixels. You can specify the default width in the Appearance node of the Options dialog box. Show me what the
 narrow,
  normal, and
  unlimited widths look like.
Note: You can also view an activity's description by clicking on an activity and looking in the Activity Description property box. You can view an activity's summary by right-clicking on an activity or the Designer Pane, selecting View Properties, and selecting the Summary tab.
Customizing how you interact with and view the Designer Pane
- Pan Tool: The Pan Tool lets you grab the Designer Canvas and move it in any direction to view previously hidden portions of the canvas. To change the cursor to the Pan Tool, right-click on the Designer Pane or an activity. Point to View Options, and select Switch to Pan Tool. Alternatively, click the Pan Tool button
 on the toolbar.
 - Compact Layout: This layout makes the activities smaller, moves the activities closer together, and hides activity descriptions and summaries. The text size of the activity name is kept the same. You might choose this layout so that you can fit more activities within view in the Designer Pane without having to zoom out, which makes the activity name smaller. To change to compact layout, right-click on the Designer Pane or an activity. Point to View Options, and select Use compact layout.
- Zoom: To zoom in or out in the Designer Pane, right-click on the Designer Pane or an activity. Point to Zoom, and select the desired zoom percentage. Alternatively, use the zoom percentage drop-down menu or buttons on the toolbar.
- Options: To change the default workflow Appearance Options, right-click on the Designer Pane or an activity and select Options.
Note: The Description options and Zoom option are not available if you right-click on the Designer Pane or an activity while in compact layout.
Viewing workflow properties
- Right-click on the Designer Pane or an activity and select View Properties. Alternatively, click on the Designer Pane, and click View Workflow Properties in the Properties Pane. More information.
Modifying activities in the Designer Pane
- Edit: Right-click an activity in the Designer Pane, and select Edit. Alternatively, double-click the activity. The activity's main property dialog box will open or focus will be given to the main property box in the Properties Pane.
- Switch Properties Pane to: Right-click an activity that has Advanced properties and point to Switch Properties Pane to. Select General or Advanced to view that category of property boxes in the Properties Pane.
- Disable: Right-click an activity in the Designer Pane, and select Disable. Disabled activities will be skipped when the workflow runs.
- Enable: If an activity is disabled, you can right-click the activity in the Designer Pane and select Enable. Enabled activities will run as configured.
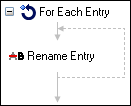
- Expand/Collapse: Right-click an activity that can contain other activities. Select to Expand or Collapse the activity. Alternatively, you can click on the plus
 or minus
  button to expand or collapse the activity.
  See an expanded activity.
 See a collapsed activity.
 - You can also select to Cut, Copy, Paste, Delete, Undo, or Redo when you right-click an activity.


